
PowerPoint VBAを使い、パックマン(PAC-MAN)を作成するマクロをご紹介します。
部分円をパックマンに見立て、円の開きの角度を変えてパックマンの口を表現します。部分円は定数「msoShapePie」を使用して描くことができます。
パックマンを作成するマクロ
コード
Sub パックマンを作成()

    Dim n As Long
    Dim w As Single
    Dim h As Single
    Dim diameter As Single
    Dim shp As shape

    '選択中のスライド番号を取得
    n = ActiveWindow.Selection.SlideRange.SlideIndex

    'スライドサイズ取得
    w = ActivePresentation.PageSetup.SlideWidth
    h = ActivePresentation.PageSetup.SlideHeight

    'パックマンの直径を「cm」で入力
    diameter = 5

    '直径を「pt」に変換
    diameter = Round(diameter * 720 / 25.4, 1)

    With ActivePresentation.Slides(n)

        'パックマンをスライド中央に挿入
        Set shp = .Shapes.AddShape( _
        Type:=msoShapePie, _
        Left:=(w - diameter) / 2, _
        Top:=(h - diameter) / 2, _
        Width:=diameter, _
        Height:=diameter)

        '口の開き
        shp.Adjustments(1) = 27
        shp.Adjustments(2) = 333

        '図形の色
        shp.Fill.ForeColor.RGB = RGB(255, 255, 0)

        '図形の線なし
        shp.Line.Visible = msoFalse

        '背景の色
        .FollowMasterBackground = msoFalse
        .Background.Fill.ForeColor.RGB = RGB(0, 0, 0)

    End With
End Sub
実行結果
実行するとパックマンがスライドの中央に挿入されます。パックマンが映えるように背景が黒色で塗りつぶされるようにしています。

図形の種類は、定数「msoShapePie」で部分円を指定しています。
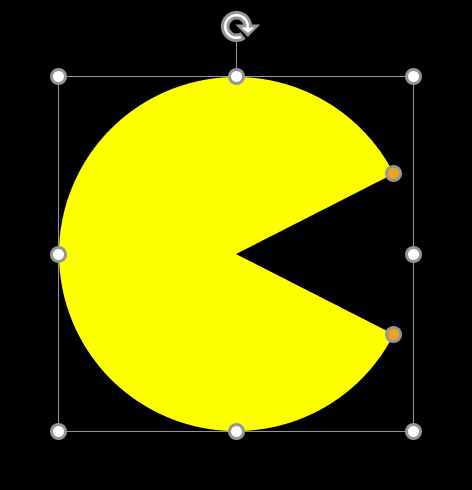
口の開きは「shp.Adjustments(1) 」と「shp.Adjustments(2) 」の値で調整ができます。
部分円の開ける角度を指定するマクロ
部分円の2つの調整ハンドルを「Adjustments」プロパティで角度指定することで、円の開きを自由に設定することができます。
コード
Sub 部分円の開きを指定する()

    Dim angle As String
    Dim n As Long
    Dim w As Single
    Dim h As Single
    Dim diameter As Single
    Dim shp As shape

    '角度入力フォーム
    angle = InputBox("開ける角度を入力してください。")

    '数値以外が入力された場合はマクロ終了
    If IsNumeric(angle) Then
    ElseIf angle = "" Then
        Exit Sub
    Else
        msg = "数値を入力してください。"
        MsgBox msg
        Exit Sub
    End If

    '選択中のスライド番号を取得
    n = ActiveWindow.Selection.SlideRange.SlideIndex

    'スライドサイズ取得
    w = ActivePresentation.PageSetup.SlideWidth
    h = ActivePresentation.PageSetup.SlideHeight

    '部分円の直径「cm」を入力
    diameter = 5

    '直径を「cm」に変換
    diameter = Round(diameter * 720 / 25.4, 1)

    With ActivePresentation.Slides(n)

        '部分円をスライド中央に挿入
        Set shp = .Shapes.AddShape( _
        Type:=msoShapePie, _
        Left:=(w - diameter) / 2, _
        Top:=(h - diameter) / 2, _
        Width:=diameter, _
        Height:=diameter)

        '円の開き
        shp.Adjustments(1) = angle - 90
        shp.Adjustments(2) = -90

        '図形の色
        shp.Fill.ForeColor.RGB = RGB(0, 0, 0)

        '図形の線なし
        shp.Line.Visible = msoFalse

    End With
End Sub
実行結果
実行するとダイアログボックスが開くので、部分円の開ける角度を入力してOKをクリックします。
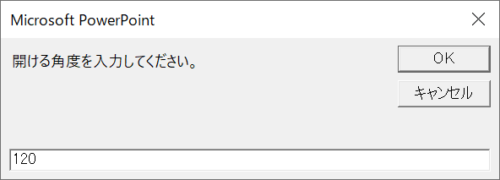
指定した角度が開いた部分円が作成されます。
「shp.Adjustments(2) = -90」で部分円の上の頂点から開きが始まるように設定し、「shp.Adjustments(1) = angle – 90」で開ける角度を設定しています。
部分円の余分な余白を削除する
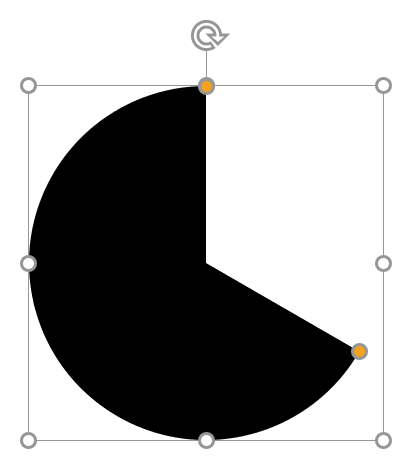
部分円は、下図のパックマンのように開ける角度によって図形とプレースホルダーとの間に余分な余白ができしてしまいます。
余白があると整列させる時に余白分のずれが生じてしまうので、削除したい場合は図形の結合を使うとよいでしょう。

部分円の塗りに収まるように同じ色で四角形を描きます。
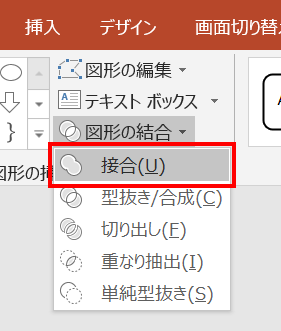
部分円と四角形を選択し、「図形の書式」タブ →「図形の挿入」グループ →「図形の結合」→「接合」をクリックします。
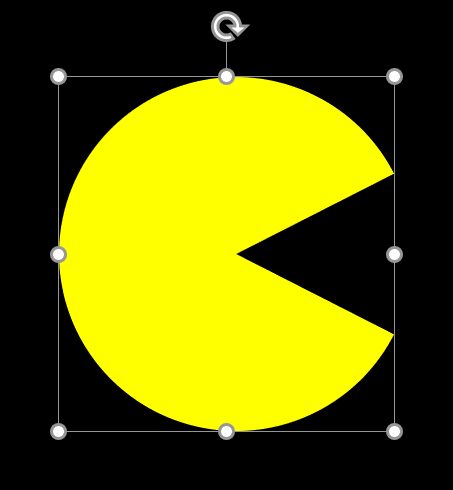
部分円の余白が削除されました。結合すると調整ハンドルも削除されるので開きの調整はできません。